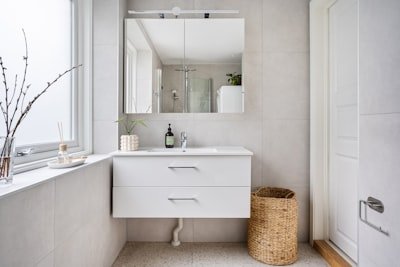


How To Choose The Right Bathroom Vanity
How To Choose The Right Bathroom Vanity: A Contractor's Expert Guide
Alright folks, pull up a chair. We're gonna talk about bathroom vanities. Now, I know what some of you might be thinking, "It's just a cabinet with a sink, right?" Wrong. Dead wrong. Your bathroom vanity isn't just some piece of furniture; it's the anchor of your bathroom, the workhorse of your daily routine, and a huge chunk of what makes your bathroom feel like yours. As a contractor, I've seen countless homeowners get this wrong, and believe me, it causes more headaches than you'd imagine. But don't you worry, I'm here to lay it all out for you, straight from the trenches, so you can pick the perfect one, save some cash, and end up with a bathroom you absolutely love.
Why Picking The Right Bathroom Vanity Truly Matters
You might be looking at your old, worn-out vanity right now, thinking, "Anything new will be better." And while that might be true visually, the real impact of a new vanity goes way beyond just looking pretty. This isn't just about aesthetics; it's about making your daily life smoother, more organized, and even adding value to your home. Think about it: every morning and every night, you're standing in front of that vanity. If it's too small, too tall, doesn't have enough storage, or just feels cheap, that's a daily dose of frustration. On the flip side, a well-chosen vanity can transform a cramped, chaotic space into a functional, beautiful retreat. It sets the tone for the entire bathroom. A good vanity can make a small bathroom feel bigger, provide much-needed storage for a busy family, and seriously impress potential buyers if you ever decide to sell. It's an investment, not just a purchase, and getting it right means years of comfort and satisfaction, not buyer's remorse.
Common Homeowner Problems When Selecting a Bathroom Vanity
Oh boy, have I seen it all. Homeowners come to me all the time with regrets about their vanity choices. Here are some of the most frequent complaints I hear:
- "It's too big/too small for the space!" This is probably the number one issue. People either try to cram a huge vanity into a tiny powder room or put a puny one in a spacious master bath, making the whole room feel off-balance.
- "There's nowhere to put anything!" Lack of storage is a killer. Families with kids, or even just one person with a decent skincare routine, need drawers and cabinets. A beautiful vanity with zero functional storage is just a pretty frustration.
- "The quality is terrible, it's falling apart already." You bought something online, it looked great in the picture, and six months later the drawers are sticking, the finish is peeling, and you're kicking yourself. Cheap materials always show their true colors eventually.
- "I hate the countertop/sink." Sometimes, people focus so much on the cabinet that they overlook the practical aspects of the top. A sink that splashes everywhere or a countertop that stains easily can drive you nuts.
- "It doesn't match anything else!" They picked a vanity they loved in a showroom, but once it's in their home, it clashes with the tile, the shower, or the overall vibe they were going for. It's like wearing socks with sandals – just doesn't work.
- "The plumbing was a nightmare to install." Some vanities look great but have awkward plumbing access or require custom work that drives up installation costs unexpectedly.
Main Causes Of Vanity Woes
So, why do these problems happen? It usually boils down to a few key missteps:
- Not Measuring Accurately (Or At All!): This is fundamental. You can't just eyeball it. Every inch counts, especially in a bathroom.
- Ignoring Plumbing Locations: Your existing water lines and drain pipe dictate a lot. Moving them can be expensive, so it's best to know what you're working with before falling in love with a vanity that won't fit without major rework.
- Impulse Buying: Getting swept up by a sale or an attractive picture online without considering the practicalities.
- Prioritizing Looks Over Functionality: A vanity can be stunning, but if it doesn't serve your daily needs, it's just a pretty obstacle.
- Underestimating Budget: Forgetting to account for the sink, faucet, countertop, installation, and any potential plumbing adjustments.
- Lack of Research on Materials: Not understanding how different materials hold up to moisture, wear, and tear.
- Forgetting the "Flow" of the Room: A vanity needs to work with the shower, toilet, and doorway without making the room feel cramped or awkward to navigate.
Warning Signs Your Current Bathroom Vanity Needs Replacing
Sometimes, it's pretty obvious, but other times, your vanity might be subtly telling you it's time for an upgrade. Here’s what to look out for:
- Water Damage: Peeling laminate, warped wood, swollen cabinets around the sink or base. This isn't just ugly; it can lead to mold and structural issues.
- Stains and Discoloration: Especially on the countertop. If you can't scrub it clean, it's a permanent eyesore.
- Sticking or Broken Drawers/Doors: If you're fighting with your vanity every morning just to get a toothbrush, that's a clear sign.
- Outdated Style: Think harvest gold laminate or those tiny, pedestal sinks that offer zero storage. If your vanity screams "last century," it's probably dragging down the whole bathroom.
- Lack of Storage: Are your toiletries overflowing onto the counter? Is everything a jumbled mess under the sink? You need more space.
- Uncomfortable Height: Are you constantly bending over or reaching too high? Standard vanity heights have changed; newer ones are often taller and more ergonomic.
- Visible Plumbing Issues: Constant drips under the sink, rusty pipes, or a general feeling that the plumbing is about to give out.
Step By Step Solutions For Choosing The Perfect Bathroom Vanity
Alright, let's get down to brass tacks. This is where you put on your contractor hat and start planning like a pro. Follow these steps, and you'll be golden.
Step 1: Measure Your Space Like a Boss
This is non-negotiable. Grab a tape measure, a notepad, and a pencil.
- Width: Measure the wall space available from wall to wall, or from the wall to the edge of the shower/toilet. Leave a few inches (at least 4-6 inches) between the vanity and any obstruction like a toilet or shower for comfortable use and code compliance.
- Depth: Standard vanities are usually 20-23 inches deep. Make sure it won't impede the bathroom door swing or create a tight squeeze.
- Height: Standard heights used to be around 30-32 inches. Today, "comfort height" vanities are popular, ranging from 34-36 inches, similar to kitchen counters. Consider who will be using it most.
- Door Swings: Check if cabinet doors or drawers will hit anything when opened.
Sketch out your bathroom layout. Mark where the existing plumbing is. This visual aid is incredibly helpful.
Step 2: Understand Your Plumbing & Layout Constraints
Before you get excited about a floating vanity, peek under your current one.
- Wall-Mounted vs. Floor-Mounted: Your drain and water lines might be coming out of the wall or the floor. This impacts what kind of vanity you can easily install. Moving plumbing is possible, but it adds significant cost and complexity.
- Sink Location: Are you replacing a single sink with a single sink? Or do you want a double? Make sure the new vanity can accommodate the existing rough-ins or be prepared for plumbing relocation.
Step 3: Determine Your Storage Needs and Family Use
Who uses this bathroom? How many people? What do they need to store?
- Master Bath: Often needs ample storage for two people, cosmetics, towels, etc. Double sinks might be a priority.
- Kids' Bath: Durability is key. Storage for toys, bath products, and easy-to-clean surfaces.
- Guest Bath/Powder Room: Less storage needed, often a smaller footprint, so aesthetics can take center stage.
Do you need drawers? Cabinets with shelves? Open shelving for decorative items? Think about functionality first.
Step 4: Choose Your Style & Aesthetic
This is where your personal taste comes in, but make sure it complements your home's overall style.
- Modern/Contemporary: Sleek lines, minimal ornamentation, often floating designs, simple hardware. Think white, grey, natural wood tones.
- Traditional: Ornate details, raised panel doors, often darker wood finishes, classic hardware.
- Transitional: A blend of modern and traditional. Clean lines with some classic touches, very versatile.
- Farmhouse/Rustic: Distressed wood, open shelving, sometimes barn-door style elements.
Step 5: Select the Right Vanity Type
- Freestanding Vanities: Look like a piece of furniture, sit on the floor, easy to install. Come in a huge variety of styles and sizes.
- Built-In/Cabinet Vanities: Custom or semi-custom cabinets built into the wall, often offering maximum storage and a seamless look.
- Floating Vanities: Mounted directly to the wall, leaving the floor clear. Great for modern aesthetics and making small spaces feel larger, but require sturdy wall blocking and careful plumbing.
- Pedestal Sinks: Minimalist, great for tiny powder rooms where storage isn't a concern. No counter space.
- Console Vanities: Similar to pedestal sinks but often with a small shelf or open frame underneath, offering a bit more style and space for a basket.
Step 6: Pick Your Countertop Material Wisely
This decision impacts durability, maintenance, and cost.
- Quartz: My personal favorite for bathrooms. Extremely durable, non-porous (stain-resistant, no sealing needed), wide range of colors and patterns. Mid-to-high cost.
- Granite: Natural stone, beautiful, heat resistant. Requires periodic sealing to prevent stains. High cost.
- Solid Surface (e.g., Corian): Seamless look (can integrate sink), non-porous, repairs easily. Mid-range cost.
- Laminate: Most affordable. Wide variety of patterns, but not as durable or heat resistant as other options. Can look dated quickly.
- Cultured Marble: Affordable, often comes with an integrated sink. Can scratch and dull over time.
- Wood: Beautiful, but requires diligent sealing and maintenance to prevent water damage. Not for high-traffic or splash-prone areas.
Step 7: Consider Your Sink Options
The sink type affects both aesthetics and cleaning.
- Undermount: Sink is mounted underneath the countertop, creating a seamless look and making cleanup a breeze (just wipe crumbs directly into the sink).
- Drop-in/Self-Rimming: Sink drops into a cutout from above, with a rim resting on the countertop. Easier to install, but the rim can collect grime.
- Vessel: Sink sits entirely on top of the counter. Very stylish, but can be harder to clean around the base and might create an uncomfortable height if the vanity is standard.
- Integrated: Sink and countertop are molded as one piece (common with cultured marble or solid surface). Super easy to clean, very modern.
Step 8: Don't Forget Faucet Compatibility
The number of holes in your sink/countertop dictates your faucet choice.
- Single-hole: For single-handle faucets.
- 4-inch centerset: For faucets with separate hot and cold handles, mounted on a 4-inch plate.
- 8-inch widespread: For faucets with separate hot and cold handles, with wider spacing between them.
Make sure your chosen faucet fits the holes, and that the spout reaches far enough into the basin without splashing.
Step 9: Evaluate Material and Construction Quality
You get what you pay for. Look for:
- Solid Wood or Plywood: These are superior to particle board or MDF (medium-density fiberboard) for durability, especially in a humid bathroom environment. If MDF is used, ensure it's high-quality and sealed properly.
- Dovetail or Dado Joints: Stronger drawer construction than stapled or glued butt joints.
- Soft-Close Hinges and Drawer Glides: A small luxury that prevents slamming and extends life.
- Durable Finish: A good quality paint or stain that can withstand moisture.
Step 10: Set a Realistic Budget
Remember to factor in not just the vanity itself, but also:
- Faucet: Can range from $50 to $500+.
- Sink: If not integrated, can be $50-$200+.
- Countertop: If not included, can be hundreds to thousands depending on material.
- Installation: Plumbing, demo, and installation costs.
- Mirror/Lighting: Often overlooked, but essential.
Professional Contractor Advice You Can Trust
After decades in this business, I've got some wisdom to share. Listen up:
- Plan, Plan, Plan: I can't stress this enough. Measure three times, buy once. Sketch layouts, consider traffic flow, and think about your morning routine. The more you plan upfront, the fewer surprises you'll have.
- Don't Skimp on Quality: I've seen homeowners try to save a few bucks on a vanity, only to have it fall apart in a couple of years. Then they call me to replace it, and they end up paying more in the long run. Invest in solid construction and good materials, especially for the countertop. It’s worth it.
- Consider Future Needs: Are you planning to stay in this house for a while? Will your family grow? A single vanity might work now, but a double might be a lifesaver in a few years.
- Think About Maintenance: Some materials look great but are a pain to keep clean or require special sealants. Be honest with yourself about how much upkeep you're willing to do.
- Hire a Pro for Installation (If Needed): While some DIY enthusiasts can handle a vanity swap, if you're moving plumbing, dealing with electrical, or installing a complex floating unit, call a licensed plumber or a skilled contractor. A botched installation can lead to leaks, mold, and costly repairs down the road. It’s not worth the risk.
- Check Reviews: Before buying a vanity, especially online, check reviews. Look for comments on build quality, ease of assembly, and how the company handles issues.
- Don't Be Afraid to Get Custom: If your space is really unique or you have specific needs, a custom vanity might be more expensive upfront, but it'll fit perfectly and give you exactly what you want. Sometimes, it's the only practical solution.
Best Materials Or Equipment For Your Bathroom Vanity
When it comes to the guts of your vanity, here’s what I recommend looking for:
Cabinet Construction:
- Solid Wood (Oak, Maple, Cherry): The gold standard. Durable, long-lasting, but also the most expensive. Great for traditional styles.
- Plywood: Excellent stability, resists moisture well, and is a strong choice. More affordable than solid wood but still high quality. Many modern vanities use plywood.
- High-Quality MDF (Medium-Density Fiberboard): Not all MDF is bad. If it's high-density, properly sealed, and well-constructed, it can be a good option for budget-friendly vanities. Look for water-resistant properties. Avoid cheap particle board like the plague in a bathroom.
Countertop Materials:
- Quartz: (As mentioned) My top recommendation for its durability and low maintenance.
- Granite: Natural beauty, great if you love the unique patterns. Just remember the sealing.
- Solid Surface: Seamless, hygienic, and can be repaired. Good mid-range option.
- Porcelain/Ceramic: Often used for integrated sinks and tops. Very durable and easy to clean.
Hardware:
- Stainless Steel or Brass: Resists corrosion better than cheaper metals.
- Soft-Close Hinges and Drawer Glides: A small upgrade that makes a huge difference in daily use and cabinet longevity.
Faucets:
- Solid Brass Construction: Ensures durability and prevents corrosion. Look for ceramic disc valves for drip-free operation.
- Finishes: Chrome, brushed nickel, and matte black are popular and durable. PVD (Physical Vapor Deposition) finishes are very tough.
Benefits Of Choosing The Right Bathroom Vanity
When you get this right, the payoff is huge. Here’s what you can expect:
- Enhanced Aesthetics: A stunning focal point that elevates the entire bathroom's design.
- Improved Functionality: Enough counter space, the right height, and easy access to essentials.
- Superior Storage: No more cluttered counters! Everything has its place, making your mornings less stressful.
- Increased Home Value: A well-chosen, high-quality vanity is a significant upgrade that appeals to future buyers.
- Durability and Longevity: You won't be replacing it in a few years, saving you money and hassle.
- Personalized Comfort: A space that truly reflects your style and meets your unique needs.
- Easier Maintenance: Choosing the right materials means less scrubbing and less worry about stains or damage.
Common Mistakes To Avoid When Buying A Bathroom Vanity
I've seen these mistakes happen countless times. Learn from others' pain!
- Ignoring Measurements: Seriously, this is number one. Don't guess. Measure, measure again, and then check the product dimensions.
- Forgetting About Plumbing: Assuming all vanities fit all plumbing is a rookie error. Your existing pipes are a big factor.
- Buying Without Seeing It In Person (If Possible): Pictures can be deceiving. Color, finish, and overall scale can look different online. If you can't see the exact model, try to see similar models from the same brand.
- Choosing Style Over Substance: A beautiful vanity that doesn't hold anything or is a nightmare to clean will quickly lose its appeal.
- Underestimating Installation Costs: The price of the vanity is just one piece of the puzzle. Factor in demolition, plumbing, and labor.
- Not Considering the Mirror and Lighting: These are integral to the vanity area. A vanity that's too wide might make your mirror look tiny, or block a light fixture.
- Ignoring the Weight: Some vanities, especially those with stone tops, are incredibly heavy. Make sure your floor can support it, and plan for help during installation. Floating vanities need proper wall reinforcement.
- Going Too Trendy: While a little trend is fine, committing to something extremely "of the moment" can make your bathroom look dated very quickly. Aim for classic elements with modern touches.
Bathroom Vanity Maintenance Checklist
Once you've got that beautiful new vanity in place, a little TLC goes a long way to keeping it looking great.
- Daily Wipe-Down: After use, wipe down the countertop and sink to prevent water spots and soap scum buildup.
- Regular Cleaning: Use appropriate cleaners for your countertop material. Mild soap and water are often best. Avoid abrasive cleaners or harsh chemicals that can damage finishes.
- Seal Stone Countertops: If you have granite or marble, re-seal it every 6-12 months (or as recommended by the manufacturer) to prevent staining.
- Check for Leaks: Periodically open the cabinet and inspect the pipes and connections for any drips or moisture. Catching a small leak early can prevent major water damage.
- Tighten Hardware: Over time, cabinet pulls and door hinges can loosen. Give them a quick tighten with a screwdriver every few months.
- Address Spills Immediately: Especially on wood or porous countertops. Don't let water sit.
- Protect Surfaces: Use trays for toiletries to contain spills and protect the vanity top from scratches.
Bathroom Vanity Safety Tips
Safety first, always! Especially when you're working with water and potentially heavy objects.
- Shut Off Water Supply: Before doing any work on the sink or faucet, always turn off the main water supply to the bathroom or the entire house.
- Secure Floating Vanities Properly: If you're installing a floating vanity, ensure it's anchored into wall studs or proper blocking. These things are heavy, especially once loaded, and you don't want it falling off the wall.
- Electrical Safety: If you're dealing with new outlets or lighting around the vanity, always turn off the power at the breaker box. Better yet, call a licensed electrician. Water and electricity don't mix.
- Lifting Heavy Items: Vanities with stone tops are incredibly heavy. Always get help when lifting and moving them to prevent injury. Use proper lifting techniques.
- Ventilation: Ensure your bathroom has adequate ventilation (an exhaust fan) to prevent moisture buildup, which can damage your vanity over time and lead to mold.
- Chemical Storage: Store cleaning supplies and chemicals safely and out of reach of children, especially if your vanity has open shelving.
Cost Saving Tips For Your Bathroom Vanity Project
Remodeling can be expensive, but there are smart ways to save without sacrificing quality.
- Standard Sizes: Opt for standard-sized vanities rather than custom. They're mass-produced and generally much more affordable.
- Shop Sales: Keep an eye out for seasonal sales, holiday discounts, and clearance items at home improvement stores or specialized kitchen and bath showrooms.
- Consider an Integrated Sink/Countertop: These often come as one unit (like cultured marble or some ceramic tops) and can be more budget-friendly than buying a separate sink and stone countertop.
- DIY Where Possible (and Safe): If you're handy, doing the demolition or even the basic installation of a pre-assembled vanity can save on labor costs. BUT, know your limits, especially with plumbing or electrical.
- Refurbish or Repurpose: If your existing vanity cabinet is solid but just outdated, consider repainting it, adding new hardware, and replacing just the countertop and sink. You can also find old dressers or cabinets at antique shops and convert them into unique vanities with a little elbow grease.
- Choose Mid-Range Materials: Quartz countertops are excellent but not always the cheapest. Laminate or cultured marble can be good budget alternatives if chosen carefully.
- Bundle Purchases: Sometimes, retailers offer discounts if you buy a vanity, sink, and faucet as a package deal.
When To Call Professionals For Your Bathroom Vanity Installation
While I encourage homeowners to tackle projects they're comfortable with, there are definitely times when you need to bring in the pros. Don't be a hero and risk costly mistakes.
- Any Plumbing Relocation: If you're moving water lines or the drain pipe, that's a job for a licensed plumber. Messing with plumbing can lead to serious water damage.
- Structural Changes for Floating Vanities: If your wall isn't sturdy enough for a floating vanity and requires adding blocking inside the wall, a contractor or skilled carpenter is essential.
- Electrical Work: Installing new outlets, moving existing ones, or adding new lighting requires a licensed electrician. It's a safety hazard to DIY this.
- Custom Vanity Fabrication: If you need a truly custom size or design, a cabinet maker or general contractor specializing in custom builds is your best bet.
- Overwhelmed or Unsure: If the project feels too big, too complicated, or you're just not confident, call a reputable general contractor. We're here to make your life easier and ensure the job is done right.
- Time Constraints: If you need the job done quickly and efficiently, a professional team can often complete it much faster than a solo DIY effort.
Frequently Asked Questions About Bathroom Vanities
What's the standard height for a bathroom vanity?
The "standard" has really shifted over the years. Traditionally, vanities were around 30-32 inches tall. However, today, "comfort height" vanities are much more common, typically ranging from 34-36 inches. This height is more ergonomic for most adults, similar to a kitchen counter, reducing bending. For kids' bathrooms, you might stick with a lower height, or consider a step stool for little ones.
How much space do I need for a double vanity?
For a comfortable double vanity, you generally need a minimum of 60 inches (5 feet) of width. This allows for two sinks with enough counter space between them and on either side for daily use. If you have 72 inches or more, that's even better, providing a more luxurious feel and extra elbow room.
Can I put a vessel sink on any vanity?
While you theoretically can, you need to be mindful of the overall height. Since a vessel sink sits on top of the counter, it adds several inches to the vanity's height. If you put a vessel sink on a standard 34-36 inch comfort height vanity, it might end up being uncomfortably tall. It's often better to pair vessel sinks with slightly lower vanities (e.g., 30-32 inches) or ensure the total height (vanity + sink) is comfortable for you.
Is it better to buy a vanity with an integrated top or a separate top and sink?
Both have their pros and cons. Integrated tops (like cultured marble or some ceramic/solid surface options) are often more affordable, very easy to clean because there are no seams, and offer a sleek, modern look. However, if the top gets damaged, you usually have to replace the whole unit. Separate tops (like quartz or granite) with an undermount sink offer more design flexibility, can be higher quality, and if one part gets damaged, you might only need to replace that component. They typically cost more and have seams where the sink meets the counter, which can require more cleaning.
How long does it take to install a new bathroom vanity?
If you're replacing an existing vanity with a similar size and type, and no plumbing relocation is needed, a professional can often complete the installation in 4-8 hours. This includes removing the old vanity, installing the new one, connecting plumbing, and installing the faucet. If you're relocating plumbing, doing custom work, or dealing with unexpected issues, it could take a full day or even longer, possibly requiring multiple visits.
What's the difference between a freestanding and a floating vanity?
A freestanding vanity sits directly on the bathroom floor, much like a piece of furniture. It's generally easier to install as it doesn't require special wall reinforcement and plumbing access is often straightforward. A floating vanity is mounted to the wall, leaving the floor beneath it clear. This creates a very modern, open look and can make a small bathroom feel larger. However, it requires significant wall reinforcement (like bolting into studs or adding blocking) to support its weight and proper planning for wall-mounted plumbing.
Can I paint my existing bathroom vanity?
Absolutely! If the cabinet structure is solid, painting it is a fantastic cost-saving solution to update its look. You'll need to properly clean, sand, prime, and then paint with a high-quality paint designed for cabinets or humid environments. New hardware can also make a huge difference. This is a great DIY project for someone with a bit of patience.